


Table of Contents
- [Req] - Requirements
- [Intro] - Introduction
- [Smkt] - Social Marketing
- [twwt] - Twitter
[tsgnp] - Sign Up
[tstp] - Setup - [fbk] - Facebook
[fsgnp] - Sign Up
[fstp] - Setup - [intg] - Integration
[itwt] - Twitter
[ifb] - Facebook - [auto] - Automation
- [somp] - SocialOomph
[ssgnp] - Sign Up
[sstp] - Setup - [smry] - Summary
- [cprt] - Copyrights
[Req]Requirements
Below are the minimum requirements to complete this guide, and should be prepared before hand.
Skill Required: 1/5
Difficulty: 3/5
Execution Time: 25mins -2hours (depending on speed/experience)
- 1 Company Email (Can be from a free provider)
- Computer or Cell Phone with Internet Access (need access to it around once a week)
- 1 Name of Company/Group/Team (Mine is Bon Ink Creations, what's yours)
- 1 Official Website (.com or through a free company is ok)
- 1 Square Avatar/Logo/Picture (700k, PNG, GIF, JPG)
- 1 Rectangle Promotional Picture for Facebook Cover ([url=https://i175.photobucket.com/albums/w158/jonbonium/Bon Ink Creations/Social Marketing guide/FacebookCoverPhotoTemplate.png]Template[/url])
- Patience
[Intro]Introduction
[Smkt]Social Marketing
[twwt]
Premise
Twitter is a social networking site that focuses on text based status
updates that you can also attach a photo and hyper link too. You are very limited to the number of characters(letters) you can use, and links count against you but there are methods to get around that I will go into further down.
Members of twitter can follow people, or groups/organizations/companies of their interest and be prompted on their accounts of status updates(tweets) made by the ones they have chosen to follow. On the other side, others can choose to follow the ones who have followed them to see what they 'tweet' and retweet (repost another persons tweet). Then as information twitter users find informative, etc, is tweeted by the ones they follow they either retweet it to their followers, or talk about it in real life, etc.
Step 1 - Signing Up
[tsgnp]
[tsgnp]
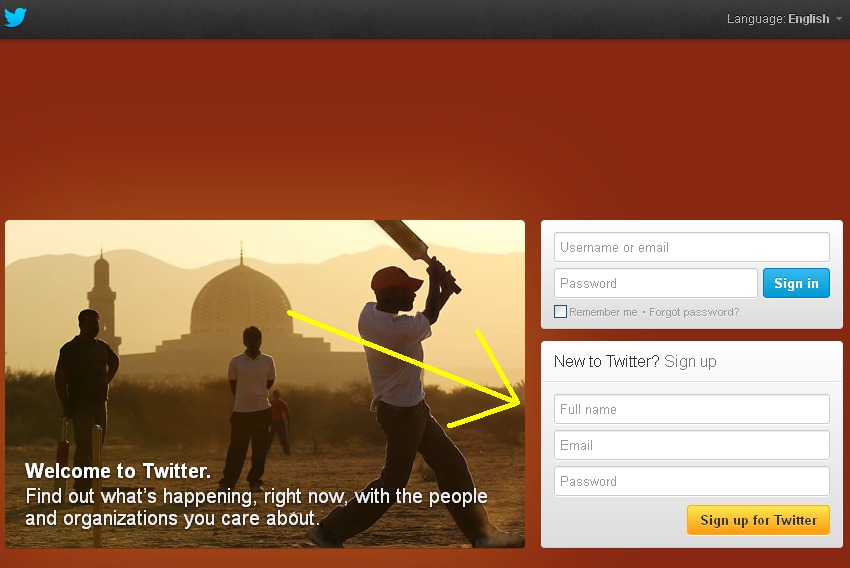
~A. Go to Twitter.com and put in your group/organization name and desired password and your company email address in order to sign up.
- Spoiler:
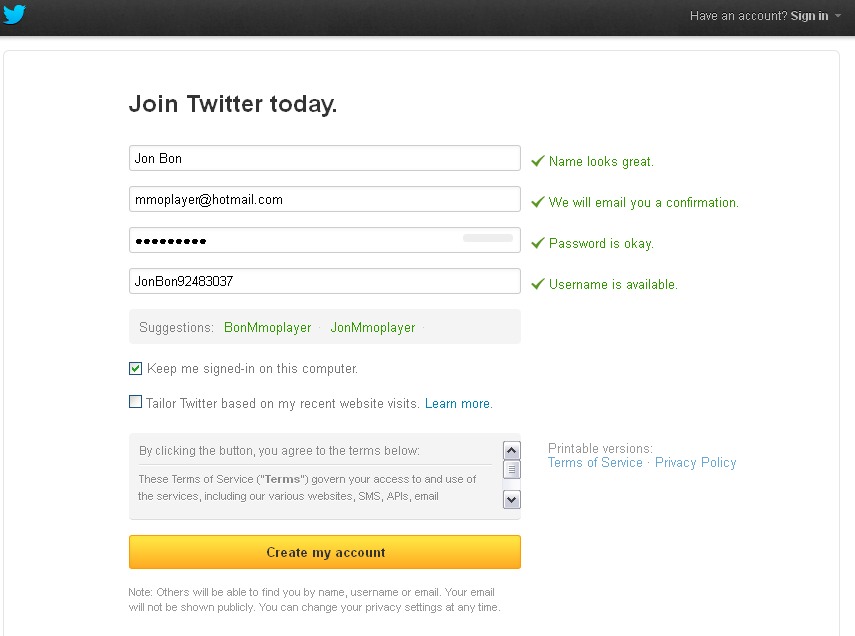
~B. You will then be prompted with a second screen where you will confirm your information, and be told if everything you presented is available and okay to use on their site. Additionally you will be asked if you want to 'Tailor Twitter based on my recent website visits." I deselect this because I would prefer to choose based on my parameters for my business not what I search for on the computer. This may be a good idea for a personal account, but not likely a business one. If you are the only person who uses the computer you set twitter up on, I suggest toggling 'Keep me signed-in on this computer'.
- Spoiler:
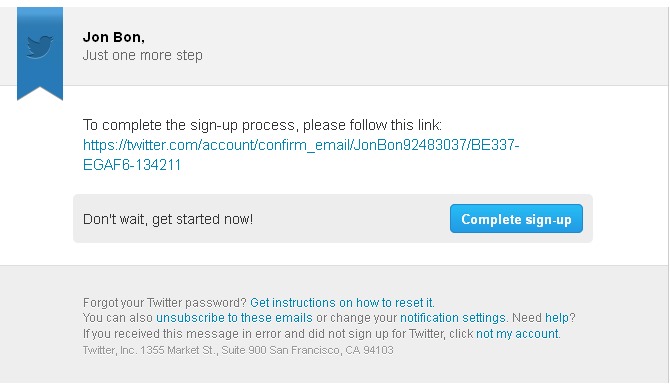
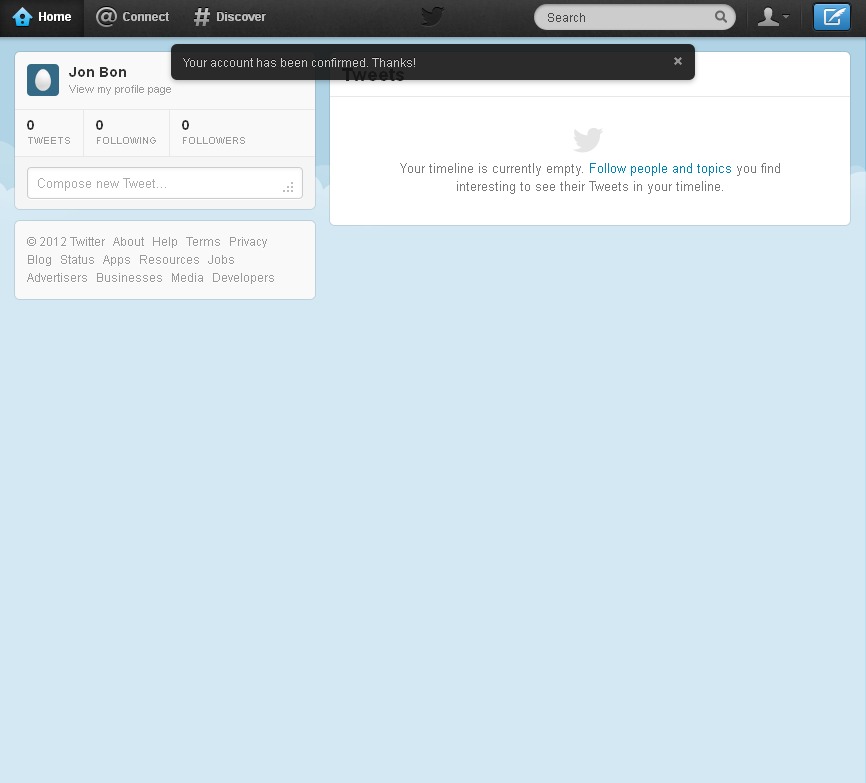
~C. Finally, log-in to your email provider (the one you signed up with) in a new internet browser tab or window, and make sure to confirm your account through the email you received, check your spam/junk folder if you cannot find it.
- Spoiler:
- Spoiler:
Step 2 - Setup
[tstp]
[tstp]
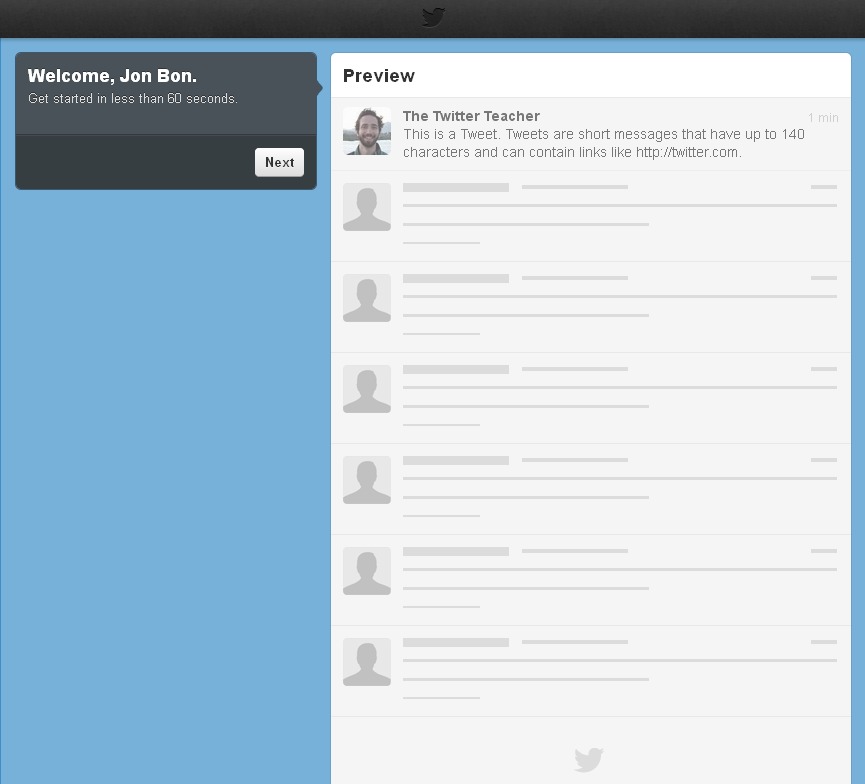
~A. Return to the internet browser tab/window you left open from step 1B and select the 'Next' button(picture below).
- Spoiler:
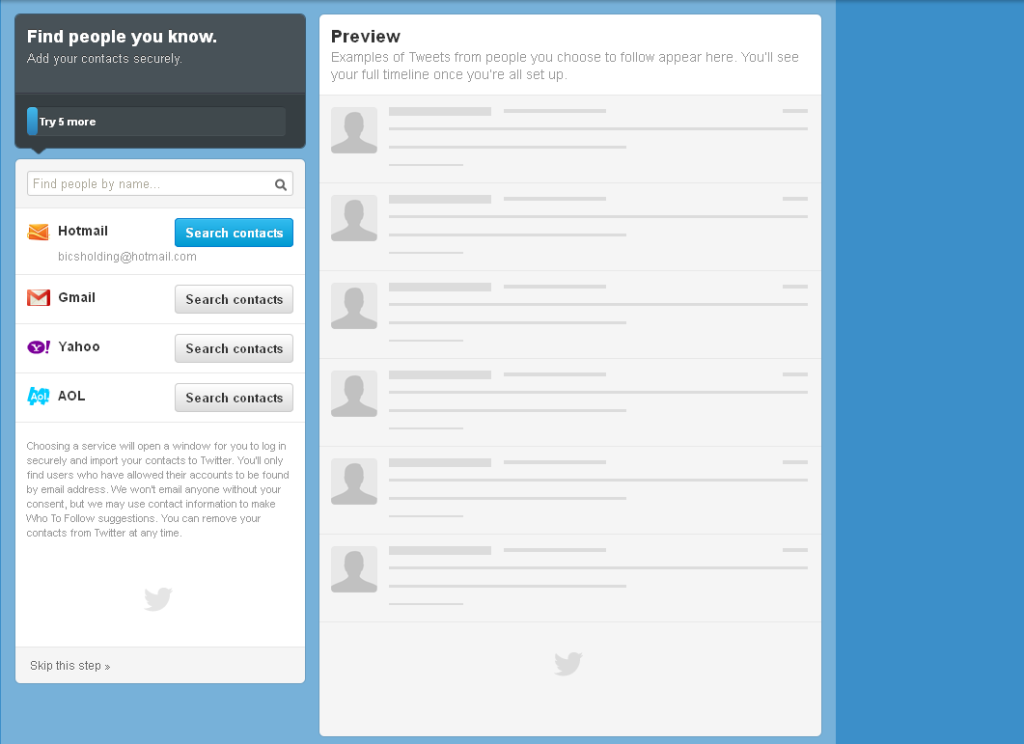
~B. You will now be prompted with a series of screens that will suggest people/organizations for you to follow on twitter. You can skip all these steps until you get to the profile setup section where you can choose your avatar picture. Unless you would like to search for people to follow, but we will handle that in another step.
- Spoiler:


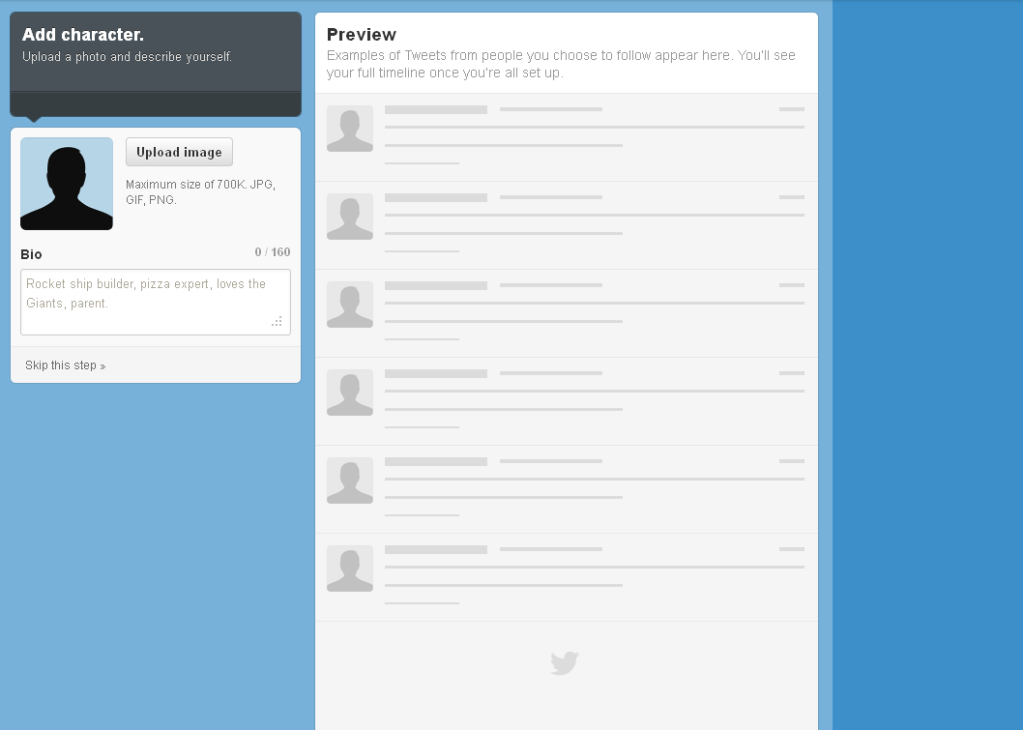
~C.When you are on the profile setup section, click the 'Upload image' button to add your square avatar/company logo, and write a short bio about your development group.
- Spoiler:
~D. If you wish you may take the time now to check into further setting up and customizing your twitter account, but I will go into that in more detail in a future guide about Twitter. Continue on with the guide, and onto setting up a facebook account.
[fbk]
Premise
Facebook is an all in one social networking site. You can post and do pretty much anything you can think of relating to connecting with other people on facebook. Games, groups, articles, status updates, videos, pictures, the list goes on. With applications that anyone can write for the site, as well as a plethora of free useful applications, the limits of facebook are endless.
The one major downside in my personal opinion is they frequently change their format/interface of the site, every year or two. So familiarizing yourself becomes a must more than it should be. In any case for our purposes the uses will be mostly automated and still gain the most benefit from it.
Step 1 - Signing Up
[fsgnp]
[fsgnp]
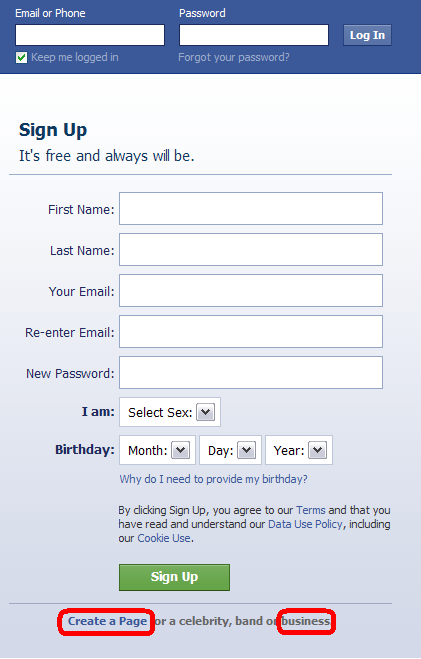
~A.. Go to facebook.com and at the very bottom you will see a 'create a page' button. Click this because you are creating a page for your studio/business rather then for personal use. Example picture below.
- Spoiler:
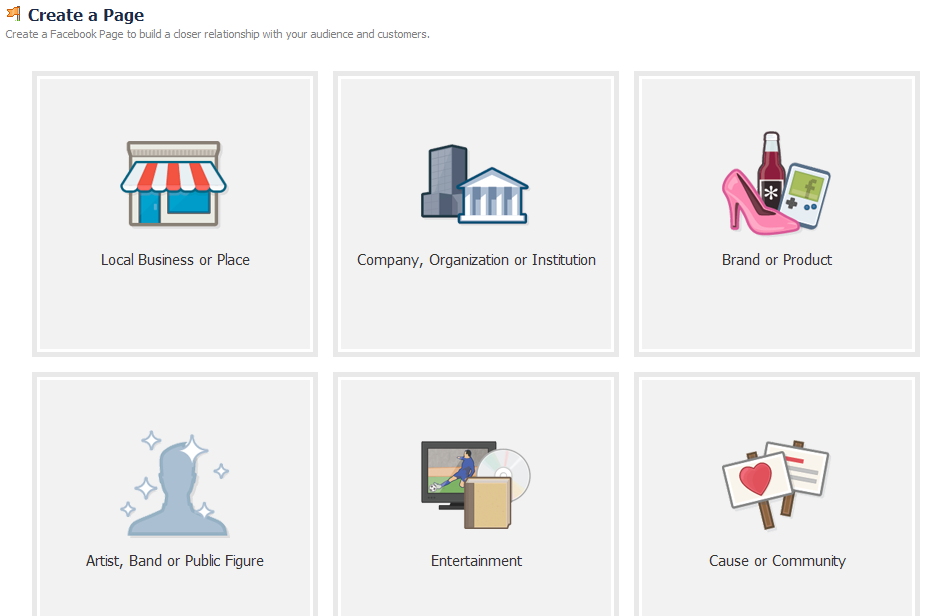
~B. Next you will be prompted to choose from 6 options for which your page to be represented as. Which one you pick is entirely up to you, and really depends on what your overall goals and plans are for your company. This is not a permanent selection but should be made accurately in order to have your page found correctly when using facebook. See example pictures below for suggestions and examples of what may suit. This can be changed later on, once you have decided you may continue.
- Spoiler:


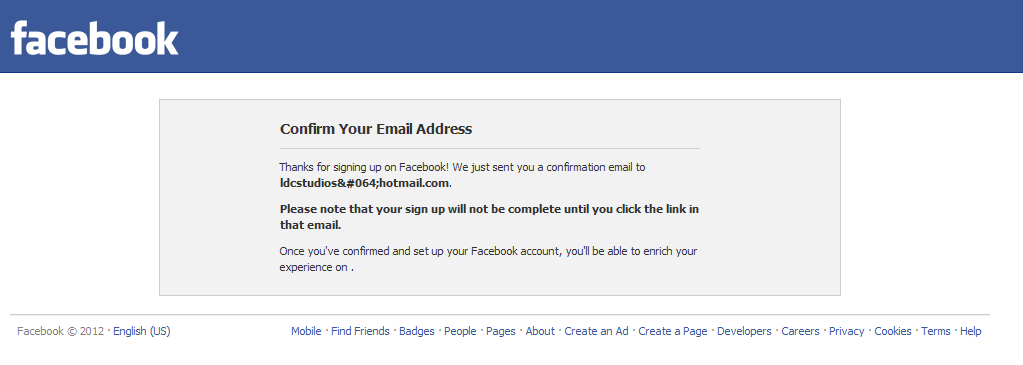
~C. You should now be prompted to confirm your email address (first picture below). Do so using the email address provided (picture of email below first picutre).
- Spoiler:
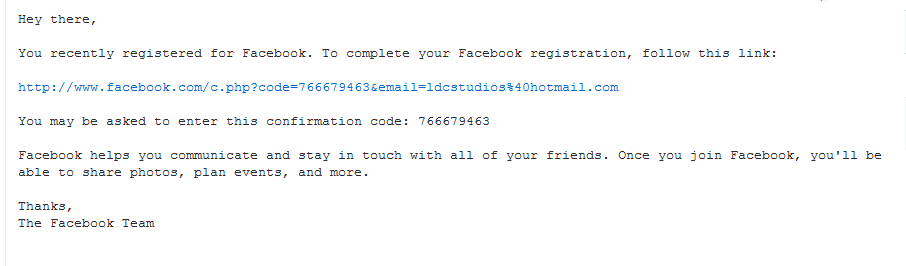
Please note that all the information above is expired and thus is freely shown at no risk.
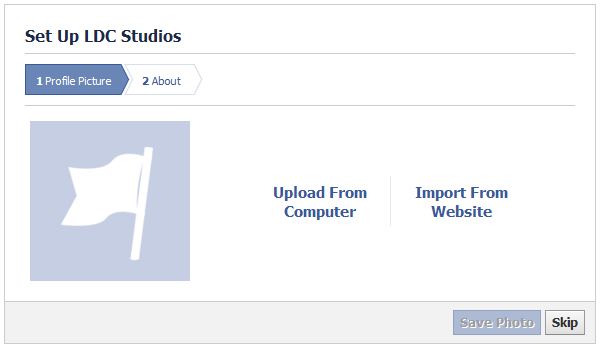
~D. You should now be signed in and verified on facebook. You should also be then prompted to put in your profile picture, you may do this now using your 'square avatar/logo' and continue on to be able to fill out your 'about' section, or you may skip this stage and use the setup directions below to learn how to make alterations in the future.
- Spoiler:
Step 2 - Setup
[fstp]
[fstp]
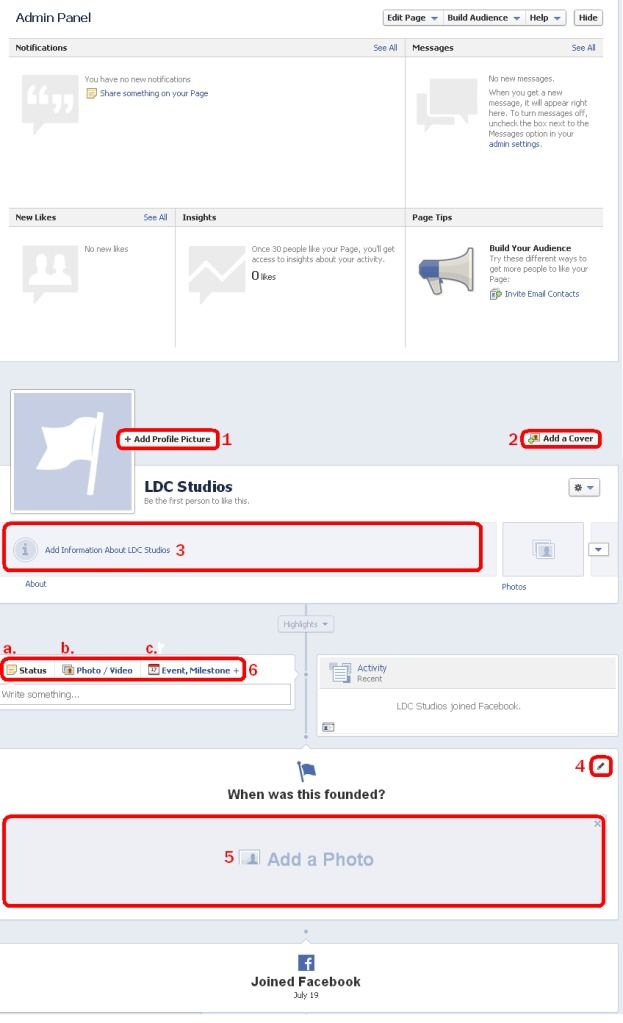
~A. You should now see a screen similar to the picture below (without the red circled areas I added). You can now customize a large number of things through facebook but for the purposes of this tutorial I have chosen to cover the 6 areas on your page highlighted in red. Below is a description of each area.
- 'Add Profile Picture' - This is where your square logo will now be dsplayed if you did so in the previous sign up step, or you can do so now by clicking here.]
- 'Add a Cover' - This is where you will add your rectangular picture from the list of requirements provided above using the [url=https://i175.photobucket.com/albums/w158/jonbonium/Bon Ink Creations/Social Marketing guide/FacebookCoverPhotoTemplate.png]template[/url]. Click this button to do so.
- 'Add information about "studio name"' - This is where the 'about' information would be if you filled it out in the previous sign up step. You may click here to add or change the information regarding your studio/company etc.
- 'When was this founded?' - Click here to add the date when you founded your group/studio/company etc. Not the Facebook founding date, but the date in general.
- 'Add a Photo' - Clicking here will allow you to add a photo to go alongside your founding
- 'Write Something...' - Click here to begin typing and hit enter to post updates (a.), picture (b.) or milestones (c.) as they happen.
- Spoiler:
~B. Once you are confident every field is setup to your likely continue on with the guide, leave facebook open in your browser. A guide that comprises the other options in Facebook will be made to help developers to further customize their sites, however for now this serves our purposes.
[intg]Integration
Twitter
[itwt]
[itwt]
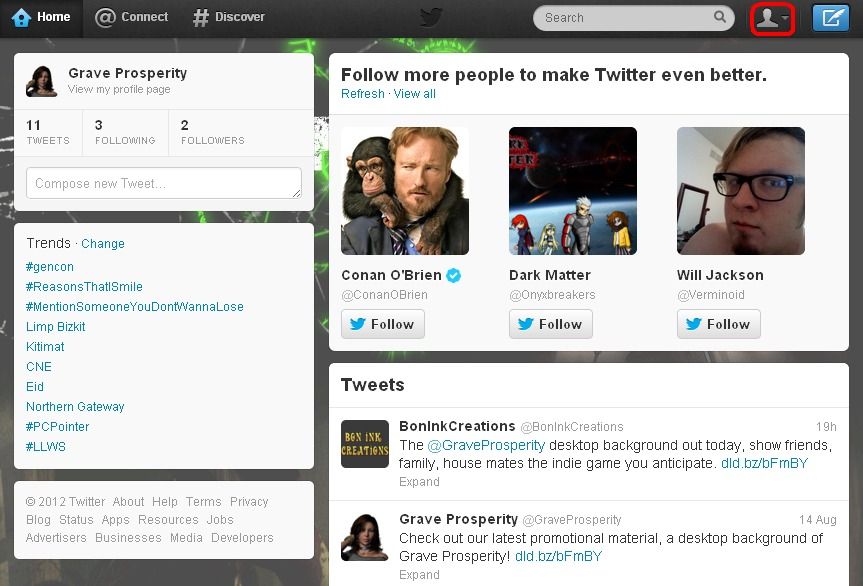
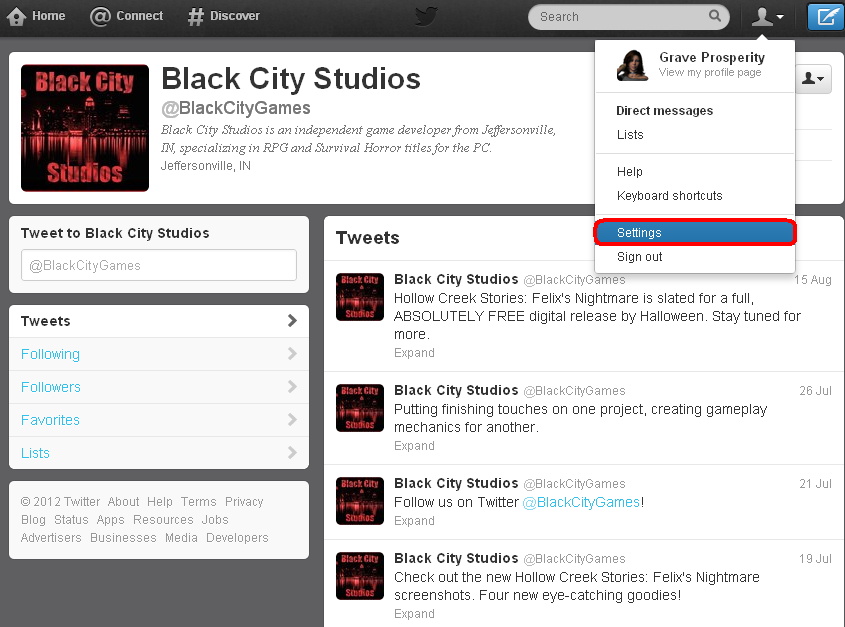
~A. On your Twitter 'Home' page select the profile button, highlighted in red in the first picture below. A drop down box will show, select the 'settings' option, example in the second picture below.
- Spoiler:
~B. When on the settings screen select the 'Profile' option shown on the left side, then select the 'Post your tweets to facebook' option on the bottom right, see picture below.
- Spoiler:

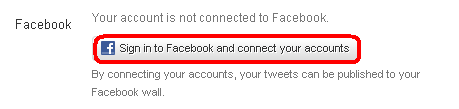
~C. Next you may see the picture below, if so select the 'Sing in to Facebook and coonect your accounts' button. If you did not see this continue to the next step. Use the facebook account we setup earlier in this guide.
- Spoiler:
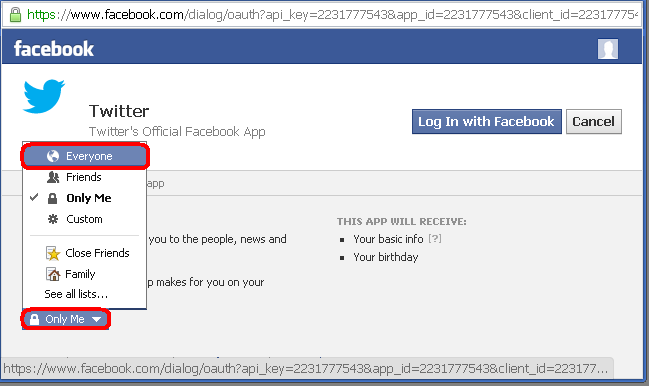
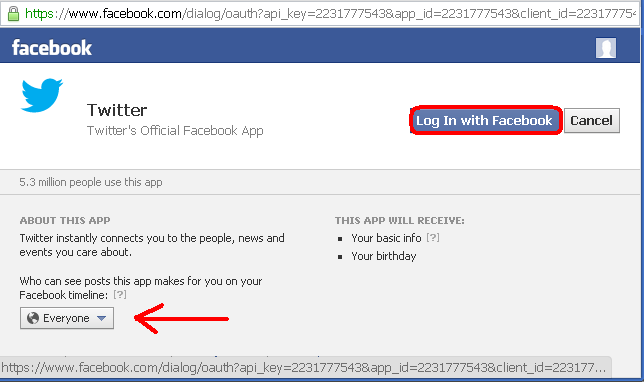
~D. You should now have an on screen pop up displayed (check your browser settings to make sure this is possible). Select the button at the very bottom left, and it will bring up a drop 'up' menu for which you should change 'only me' to Everyone, see first picture below for example. When you have made it so everyone will see your twitter updates on your facebook account, then select the 'Log In with Facebook' button, see second picture below for example.
- Spoiler:
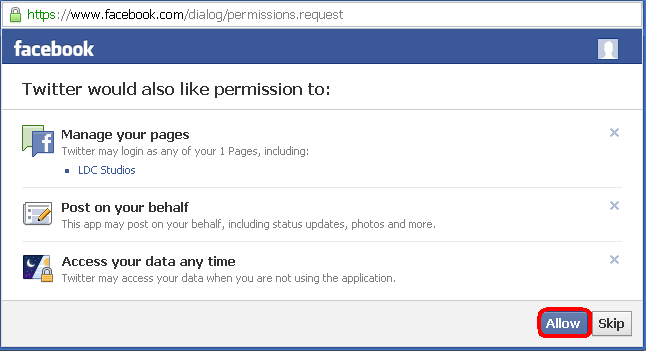
~E. You should now be prompted with what permissions to allow between twitter posting on facebook. I suggest allowing all. See example picture below.
- Spoiler:
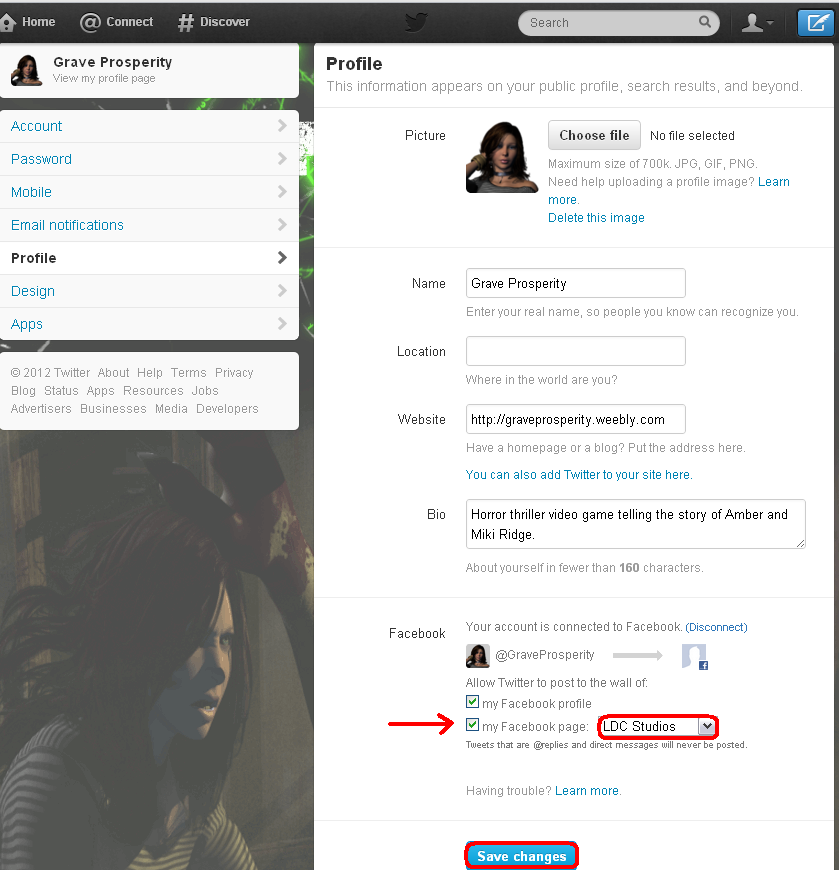
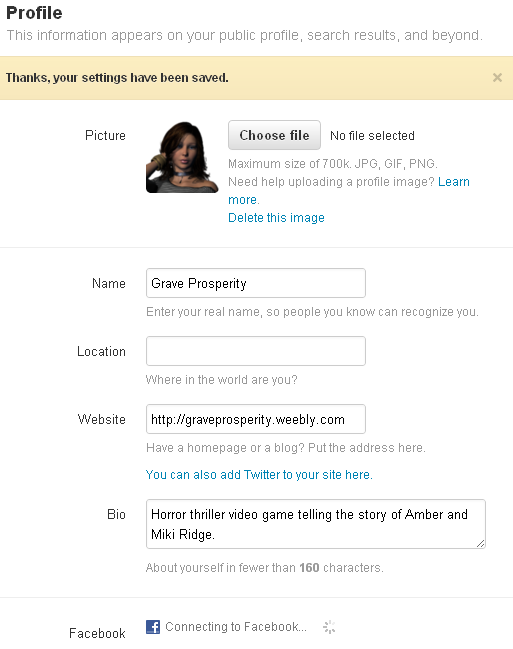
~F. You should now see the screen below on your Twitter page, indicating your facebook account is connected. I suggest toggling allow for both personal and pages, but you may not want to bother friends and family with your game release posts. In that case only select pages (this of course would only apply if you have a personal profile tied into your studio/company page on Facebook).
Select save and you will notice the Facebook section updating and a yellow bar across the top to indicate the information is indeed saved, see second picture below for example. Continue on to make any further changes on Facebook's end.
- Spoiler:
Facebook
[ifb]
[ifb]
~A.On your facebook page we created earlier, logged in, you will see an option at the top of the screen called 'Settings'. Select this option, example picture below.
- Spoiler:

~B. With the settings section open, select 'Apps' from the options along the left side, see example picture below.
- Spoiler:
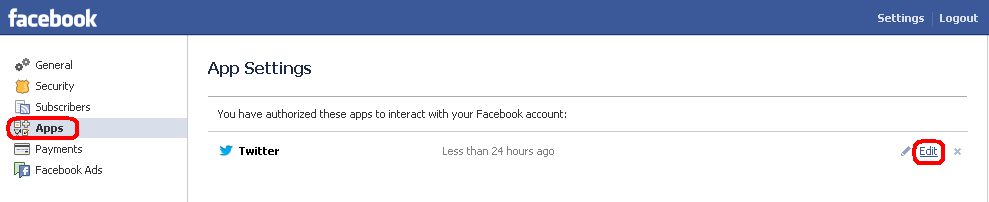
~C. You will now have access to change the things we assigned before, such as permissions for the app, and who can see the posts made by the app. If you should ever choose to remove the app this is where you would go. For now all your settings should be set right, please feel free to check just in case. When you are done continue with the last section of this tutorial, your twitter posts(tweets) should now automatically post on Facebook as a status update.
- Spoiler:

[auto]Automation
SocialOomph
[somp]
[somp]
This site allows for Twitter integration into itself (SocialOomph) so that you may post on twitter from this site, on a time schedule with a roster of posts waiting to go. Additionally you may link in multiple accounts so you can post for your team mates, as a personal post, business post etc. Keep things varied or the same, the choice is yours. Read through the steps below to setup the SocialOomph app on Twitter.
Step 1 - Signing Up
[ssgnp]
[ssgnp]
~A. Go to https://www.socialoomph.com/ and select 'Register', see example picture below.
- Spoiler:

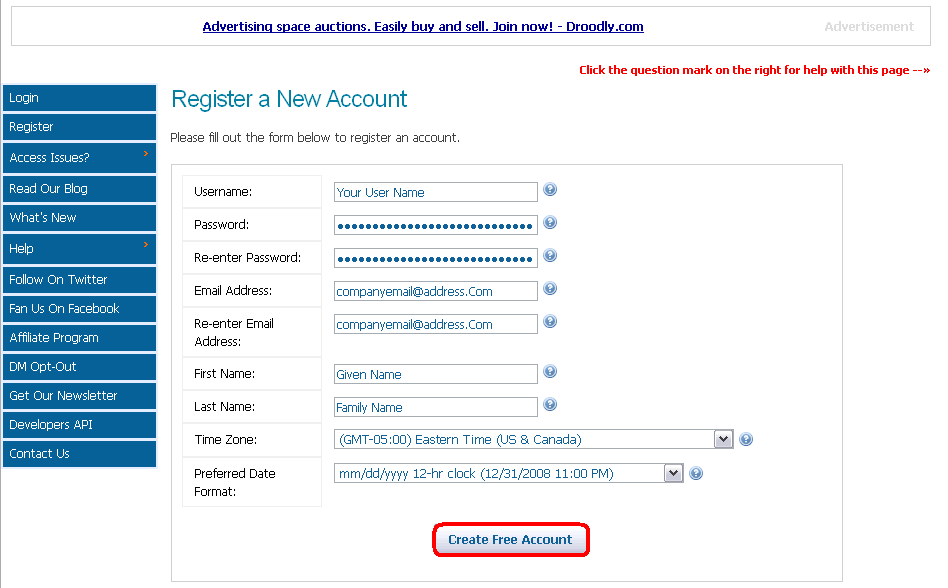
~B. Fill in your information as prompted on the next screen and when finished select the 'Create Free Account' button, see picture below for example.
- Spoiler:
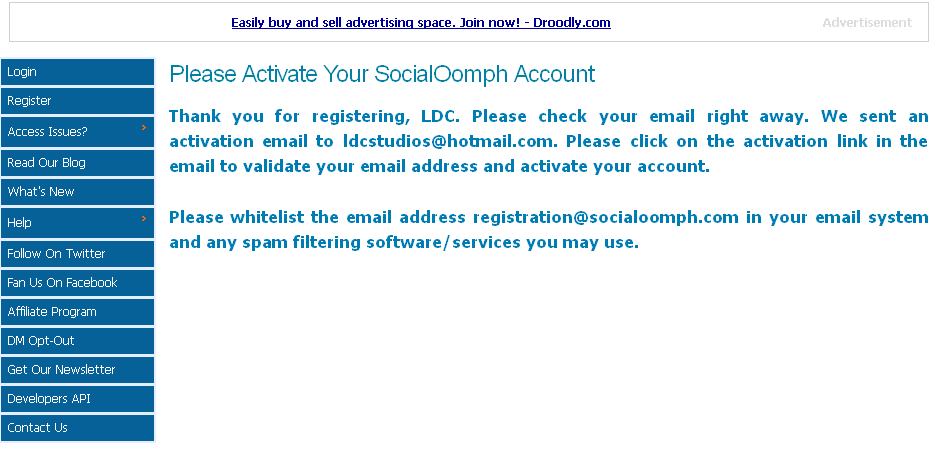
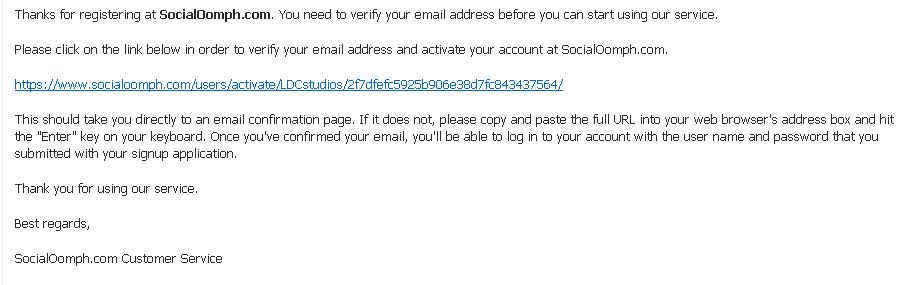
~C. You will now be prompted to activate your account via the given email address, see picture below for example.
- Spoiler:
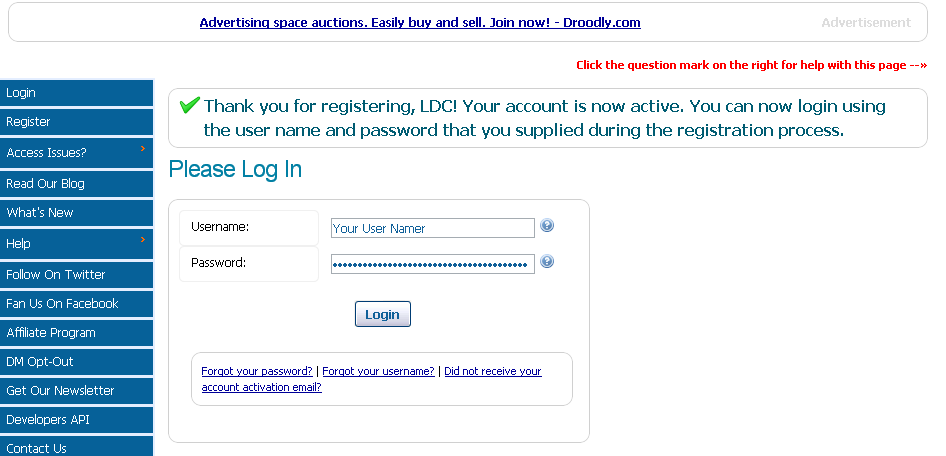
~D. Select the link given to you in your email (see first picture below), then log in with your information, see second picture below. Once you are activated and logged back in continue to the Step 2 - Setup.
- Spoiler:
Step 2 - Setup Up
[sstp]
[sstp]
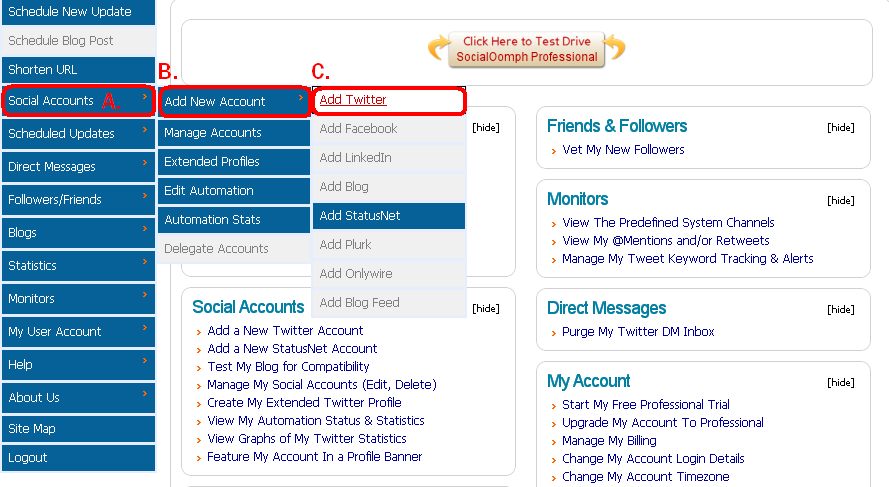
~A. Now that your account is activated and you are logged in, select the 'Social Account' (A.) option on the far right, then 'Add New Account'(B.), then 'Add Twitter'(C.), see example below.
- Spoiler:
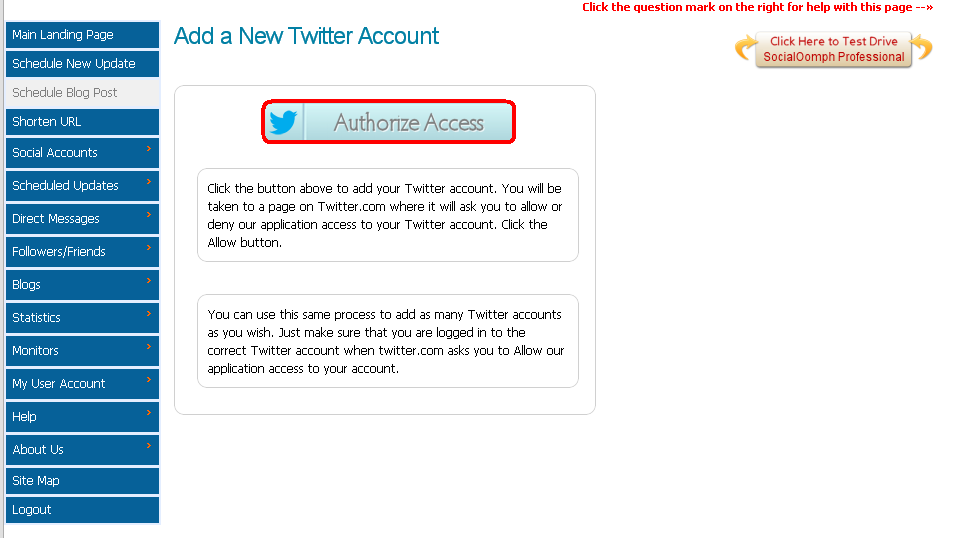
~B. You will the be prompted with a button to 'Authorize Access' select this button. Example picture below.
- Spoiler:
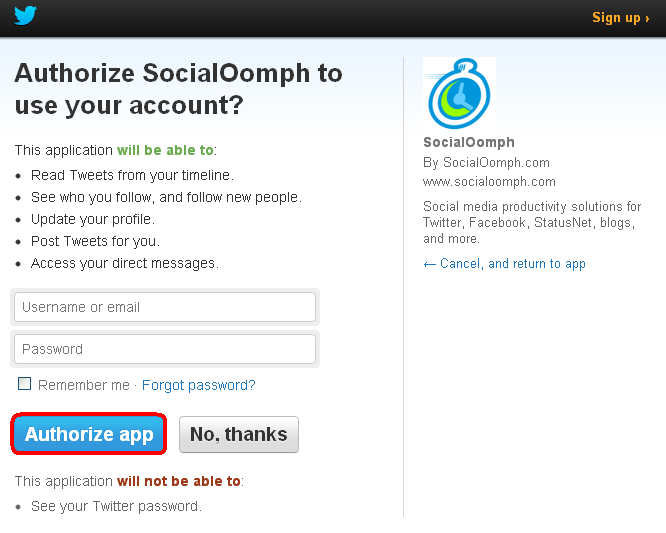
~C. You will now be prompted to put in your Twitter account info (login and password) when done select the 'Authorize app.' button (see first example picture below), you will then be redirected back, see second example picture below.
- Spoiler:

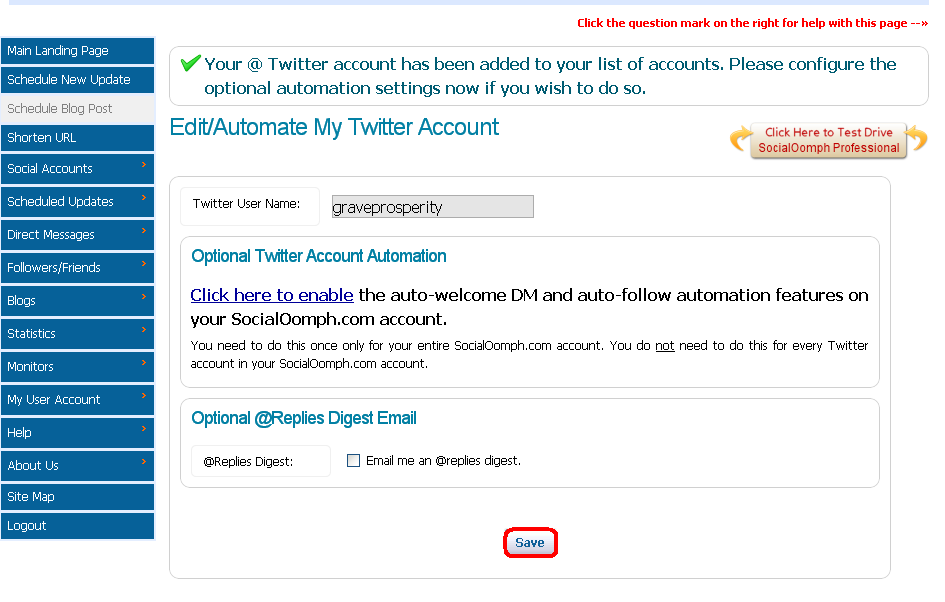
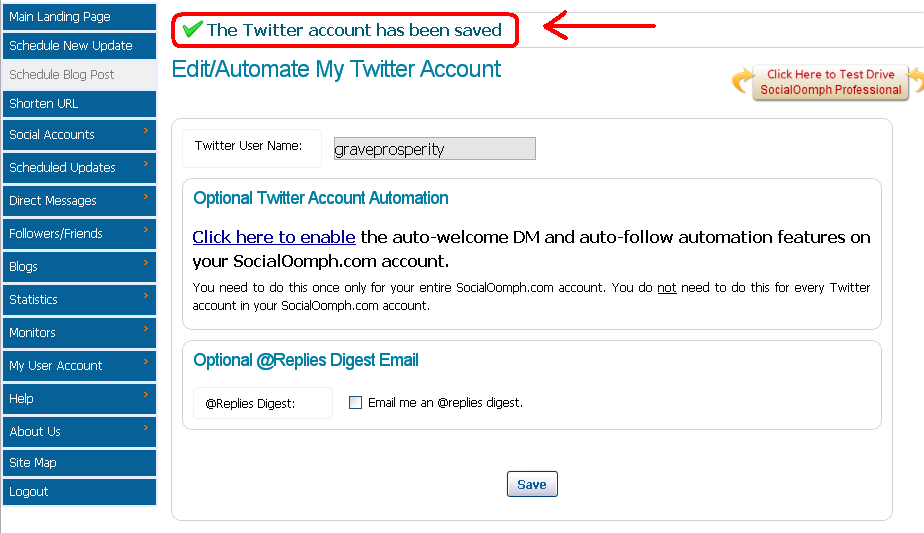
~D. After being redirected back to socialoomph you will be prompted with a confirmation of your Twitter account being linked into your socialoomph account, see first example picture below. If satisfied with the information provided select the 'save' button located at the bottom, see second example picture provided below.
- Spoiler:
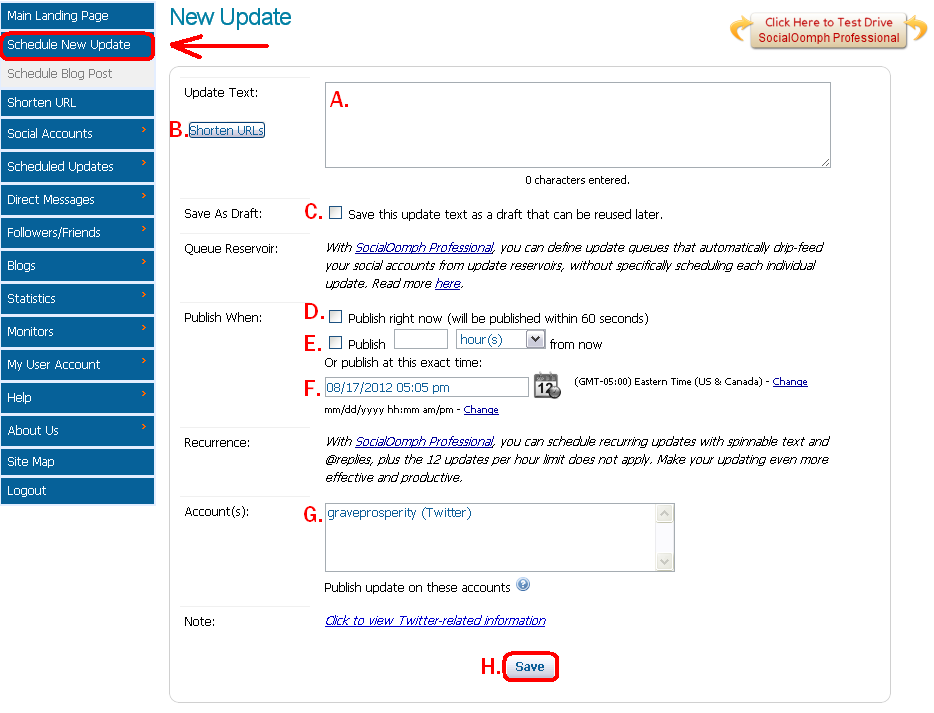
~E. At this point everything should be setup properly. Now all you have to do is start scheduling posts through your Social Oomph account and being your marketing campaigns! See example picture and legend below for explanations on how to post. Make sure to select the 'Schedule new Update' button on the far left.
a.This is where you post your twitter status updates, remember to keep it to 140 characters.
b.Click this button if you need to shorten a link you provided, this saves space when posting.
c.Use this if you need to save your draft and come back to it later.
d.Select this to publish it right now, when completed.
e.Select this and add how many hours past the current time to post it then.
f.Use this option to select a date far in the future, remember not to select options d or e if you select this.
g.Toggle which account to post the update here.
h.Select this button when you are all setup, repeats these steps to make new updates; schedule them for the future and day by day if you want.
- Spoiler:
[smry]Summary
You currently may not have any followers or likes on facebook, post your information here so everyone involved with Bon Ink Creations can 'add' you accordingly and let the social networking begin! Remember that this guide is only focused on automating and creating a basic structure for social marketing. Future guides will go into more detail of how to use this system other places and build the fan base your product deserves. Thanks for reading!
[cprt]Copy Rights
This guide is copyrighted under a Creative Commons License.

BICs Social Marketing Setup, Integration and Automation Guide by Jonathon Stuart Bon is licensed under a Creative Commons Attribution-NonCommercial-NoDerivs 3.0 Unported License.
Based on a work at https://boninkcreations.canadian-forum.com/t91-bics-social-marketing-setup-integration-and-automation-guide#172.
HTML License Code
- Code:
<a rel="license" href="http://creativecommons.org/licenses/by-nc-nd/3.0/deed.en_US"><img alt="Creative Commons License" style="border-width:0" src="http://i.creativecommons.org/l/by-nc-nd/3.0/88x31.png" /></a><br /><span xmlns:dct="http://purl.org/dc/terms/" href="http://purl.org/dc/dcmitype/Text" property="dct:title" rel="dct:type">BICs Social Marketing Setup, Integration and Automation Guide</span> by <a xmlns:cc="http://creativecommons.org/ns#" href="http://boninkcreations.canadian-forum.com/t91-bics-social-marketing-setup-integration-and-automation-guide#172" property="cc:attributionName" rel="cc:attributionURL">Jonathon Stuart Bon</a> is licensed under a <a rel="license" href="http://creativecommons.org/licenses/by-nc-nd/3.0/deed.en_US">Creative Commons Attribution-NonCommercial-NoDerivs 3.0 Unported License</a>.<br />Based on a work at <a xmlns:dct="http://purl.org/dc/terms/" href="http://boninkcreations.canadian-forum.com/t91-bics-social-marketing-setup-integration-and-automation-guide#172" rel="dct:source">http://boninkcreations.canadian-forum.com/t91-bics-social-marketing-setup-integration-and-automation-guide#172</a>.


